Guides · DIY auto scoring · 12 min read
DIY auto scoring darts: build your own camera dartboard
You can build your own auto scoring dartboard from three USB webcams, an LED ring light, firm mounts and the laptop you already have. The parts cost roughly 100 to 250 euros, and the build takes an afternoon.
In short
- Three USB webcams of the same model, 720p or better, one every 120°.
- 30 to 50 cm from the board, looking in at an angle, each seeing the whole double ring.
- Firm mounts and even light matter more than an expensive camera.
- One USB port per camera and a laptop from the last few years.
- About 100 to 250 euros for the parts, without board and computer.
Parts list
What do you need to build a DIY auto scoring dartboard?
You need a steel-tip board, three webcams, something to mount them on, even light and a computer with scoring software. The rest is cables and a few screws.
- 3webcams, one every 120° round the board
- 720pis enough, 1080p is a little sharper
- 40 cmfrom camera to board, give or take 10
- 1 porton the computer for every camera
- A bristle board in the standard colours, hung at the right height (see how to hang a dartboard)
- Three USB webcams of the same model
- Three mounts that stay put when a dart lands
- An LED ring light around the board
- USB extension cables if the computer stands more than a couple of metres away
- A laptop or PC with Chrome or Edge
- Scoring software that turns the pictures into scores
Cameras
Which webcams work for automatic darts scoring?
Ordinary USB webcams with 720p or 1080p do the job. A picture that stays the same all evening matters more than the price tag.
- Plug and playPick a webcam that needs no driver on Windows, macOS and Linux. Those are the ones a browser can open straight away.
- 720p or 1080p at 30 fps720p is enough to measure a dart. 1080p adds a little detail but doubles the data on the USB port and needs a faster computer.
- A normal lensAn ordinary webcam lens suits 30 to 50 cm. Very wide or fisheye lenses make the board small in the picture.
- A picture you can lockAutofocus and auto exposure that keep readjusting look like movement on the board. Fixed focus, or settings the browser can lock, keeps it steady.
- Three of the sameMatching cameras give the same picture from every side. Sridu’s Auto setup also prefers cameras with matching names and leaves out built-in laptop and phone cameras.
- A tripod threadMany webcams have a standard tripod thread underneath. That is far easier to fix to an arm or a printed holder than a monitor clip.
Leave the phone out of it. A scoring camera stays fixed beside the board for good. Your phone is more useful as a second screen at the oche.
Placement
Where should the cameras go around the board?
Spread three cameras evenly round the board, one every 120°, about 30 to 50 cm from it. Each one looks in at an angle from the side and has the whole double ring in its picture.
Get the angle right
The camera has to see the dart from the side, because that is how it measures the line of the barrel. Head-on it sees only the flight, and almost level with the board it loses the rings.
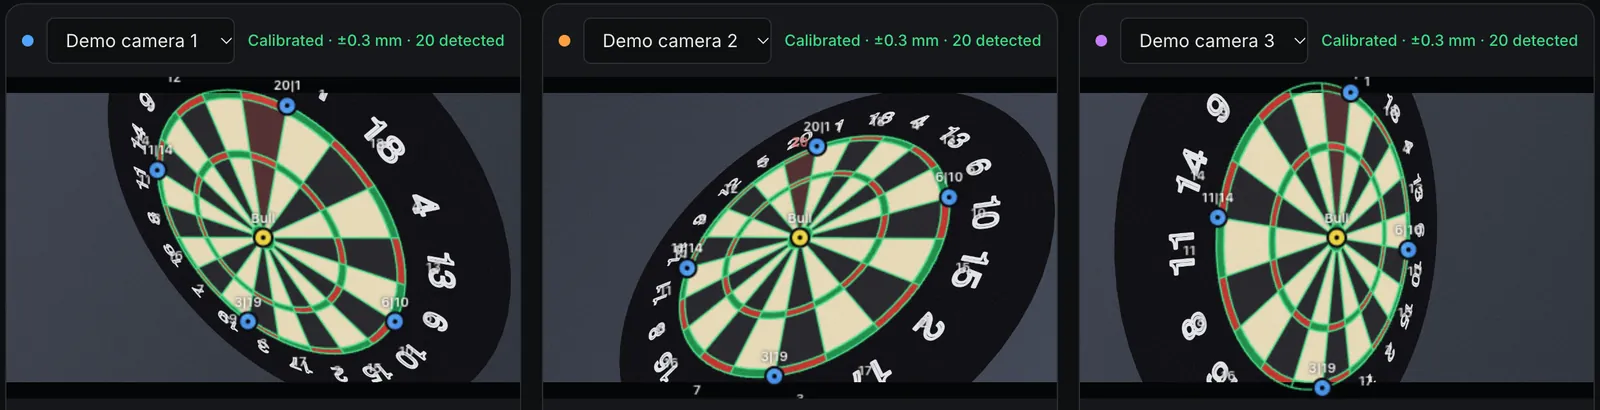
Two or four? Two cameras are the minimum to measure a tip, and a fourth gives spare views for tight groups. Why that is explained in automatic darts scoring.
Mounting
How do you mount the cameras?
Any mount will do as long as it stays put when a dart hits the board. An LED ring with holders, 3D printed arms and a wooden frame are the usual DIY routes.
- LED ring with camera holdersThe tidiest build. The ring sits round the board and carries the light and the cameras, so everything keeps its place. Check that the holders fit your webcams.
- 3D printed holdersSearch the usual 3D model sites for a darts camera mount and you find plenty that clip onto a ring or the surround. Most are drawn for one camera, so measure yours first and print with enough infill.
- Wooden frame or backboardA square of plywood behind the board with three arms of batten or aluminium flat bar. Cheap, very stiff and easy to drill for a tripod screw.
- Clamps and gooseneck armsHandy for trying out positions, but they sag and wobble when a dart lands. Fine for a first test, not for good.
Do the knock test. Tap the board next to each camera while you watch its picture. If the picture jumps, stiffen that mount before you calibrate.
Keep the camera bodies outside the surround, where a stray dart is less likely to reach them, and run the cables away from the board towards the wall.
Light
How should you light a camera dartboard?
Light the board evenly from the front, ideally with an LED ring around it, as in a well planned darts corner. Hard shadows and light that changes are the most common reason a home-built setup misses darts.
- Neutral white, the same all evening, with no mix of daylight and lamps
- Flicker-free LEDs. Bands rolling through the camera picture mean the light flickers
- Full brightness on a dimmable ring, as dimming is where cheap LEDs tend to flicker
- Curtains closed if the sun reaches the board
- No lamp shining straight into a lens
Shadows and light are covered in more depth in better detection.
Computer
What computer and USB setup do you need?
Most laptops from the last few years run three webcams, as long as each camera gets its own USB port. Cameras sharing a port fail far more often than slow processors.
- USB dataA 720p webcam sends about 40 to 65 Mbit/s, 1080p about twice that. Spread the cameras over both sides of a laptop.
- Cable lengthUSB 2 allows 5 m per cable. For longer runs use an active extension cable, which refreshes the signal.
- The computerIn Sridu’s measurements a 2017 laptop handles two cameras, and three want one from the last few years. Built-in graphics are enough.
Test the computer before you buy cameras. Sridu’s demo runs the full detection on three simulated cameras. If it plays smoothly, your computer is ready. The figures behind it are in the system requirements.
Budget
How much does a DIY auto scoring setup cost?
Expect roughly 100 to 250 euros for a solid three camera build, without the board and the computer. The webcams and the light make up most of it.
| Part | Budget build | Comfortable build |
|---|---|---|
| 3 webcams | 720p or 1080p, 60 to 120 € | 1080p with lockable focus, 150 to 250 € |
| Light | LED ring, 25 to 60 € | LED ring with camera holders, 50 to 100 € |
| Mounts | 3D printed or wooden, 5 to 25 € | Metal arms or ring holders, 20 to 60 € |
| Cables | None or one extension, up to 30 € | Active extensions, 20 to 60 € |
| Software | Free (Sridu is free for private use) | Free to a subscription, depending on the software |
| Total | about 100 to 250 € | about 250 to 450 € |
Rough street prices in euros as of October 2026. They vary a lot between shops and brands.
Kit or DIY? A ready-made camera kit usually costs more but arrives matched and tested. Building it yourself trades that for an afternoon of fitting and a free choice of every part.
Step by step
How do you build it, step by step?
Hang the board, fit the light and the mounts, aim the cameras, run the cables, then calibrate and test. Plan for an afternoon.
- Hang the boardBull centre 173 cm above the floor, oche 237 cm from the board face. Do this first, because the cameras are aimed at the board where it hangs.
- Mark the positionsCamera 1 above the 20, the other two a third of the way round, at roughly 4 and 8 o’clock. A paper template with three lines makes it quick.
- Fit the light and mountsRing light first, then the holders. Tighten everything before the cameras go on.
- Aim each cameraOpen the camera picture on the computer and turn the camera until the whole double ring sits in frame with a little margin.
- Run the cablesEach camera to its own port, clipped along the wall, with a little slack at the camera so a tug doesn’t move it.
- Calibrate and lockIn Sridu that is Auto setup on the Cameras page, then lock the picture under Image. The camera setup guide walks you through it.
- Throw test dartsTight groups at treble 20, treble 19 and the bull. If one camera keeps disagreeing, re-aim or stiffen that one.
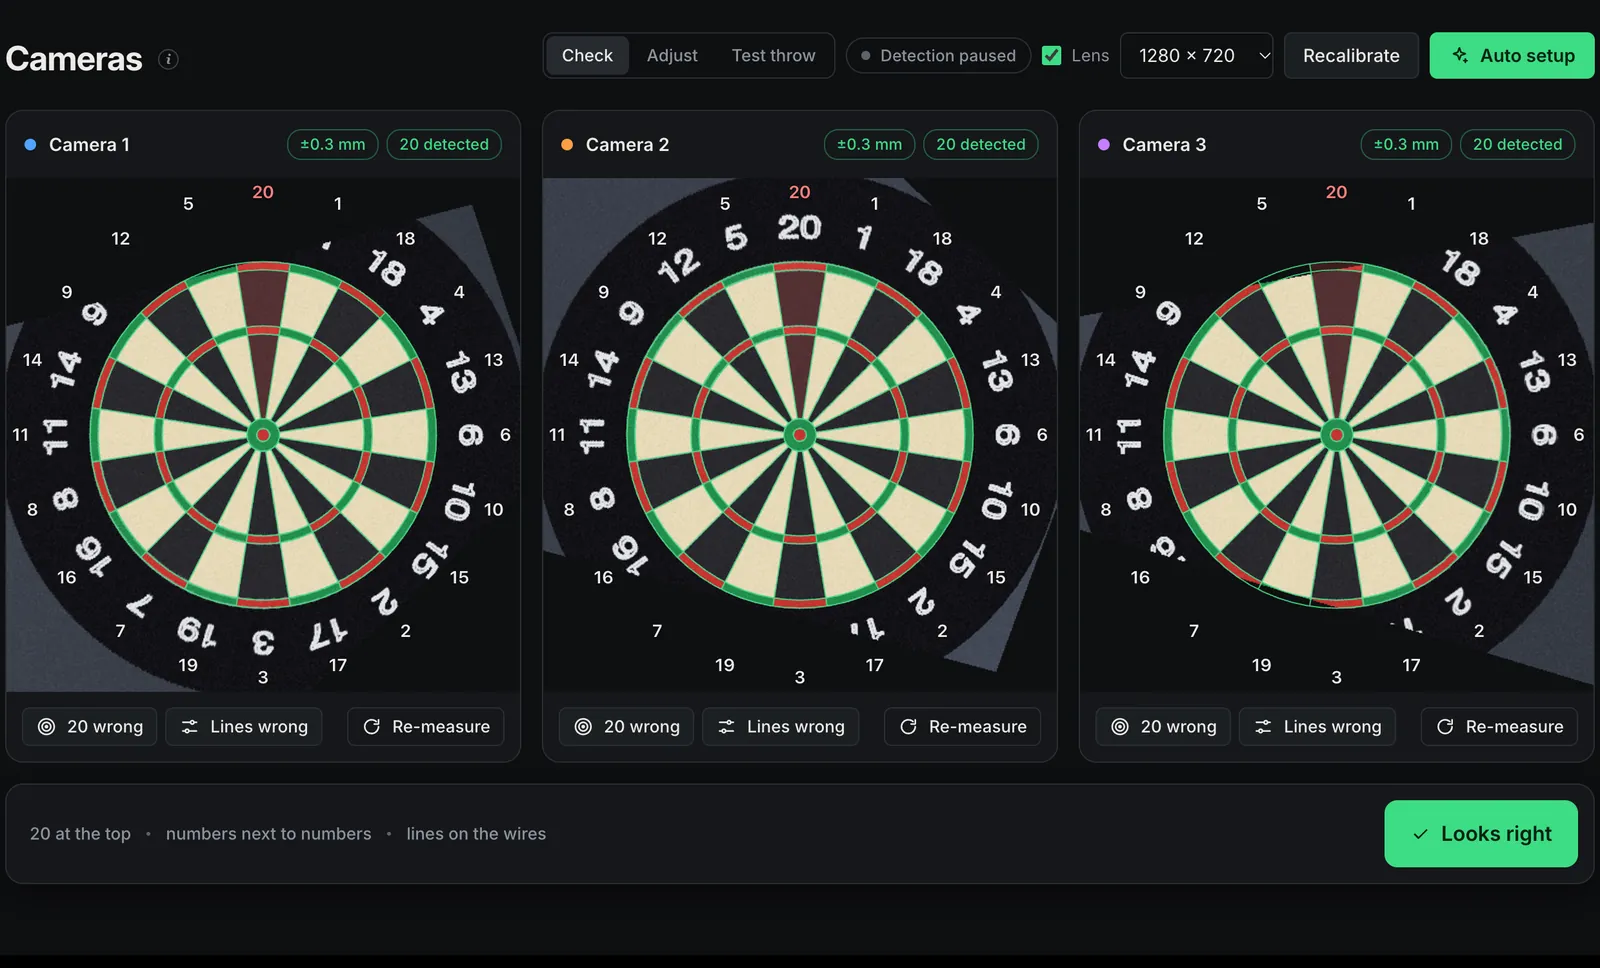
Avoid these
Which mistakes do DIY builders make most?
Most trouble with a home-built camera dartboard comes from the mounts, the light or the USB ports. The cameras themselves are rarely the problem.
Do
- Mount every camera so it can’t move
- Spread them 120° apart
- Light the board evenly from the front
- Give each camera its own USB port
- Lock focus and exposure once the light is on
- Calibrate again after rotating the board
Don’t
- Put two cameras side by side or straight opposite
- Aim a camera head-on at the board
- Rely on a ceiling lamp behind the oche
- Plug three cameras into one small hub
- Use the laptop or phone camera
- Cut off part of the double ring in a picture
Honest limits
What are the limits of a home-built camera system?
A DIY camera dartboard is only as accurate as its light, its camera positions and its mounts. With those right, clear darts count by themselves and only darts pressed against a wire need a quick check.
- Darts on a wireWhen the point sits closer to a wire than the measuring error, a careful system asks you. With Sridu’s default setting, about one 180 in five gets such a question on a good board.
- Tight groupsA dart can hide another one’s tip from a camera. Three cameras cover most of it, four cover more.
- Changing lightDaylight, a lamp switched on mid-game or a webcam readjusting itself can all report darts that aren’t there.
- Bounce-outsA dart that drops out leaves nothing to measure. Enter it as a miss if you want it in your average.
- Your timeBuilding, aiming and fine-tuning take an afternoon, and you are your own support line.
- Soft-tip boardsCamera systems are made for steel-tip darts on a bristle board.
Build it yourself
Lowest cost
- Pick every part yourself
- Easy to repair or upgrade one camera
- An afternoon of fitting and aiming
- Tuning is up to you
Ready-made kit
- Matched parts, usually tested together
- Less fiddling to get started
- Usually costs more
- The software often comes with the kit
There are also platforms that work with a phone or with your own cameras. Every approach has its strengths; the comparison describes them in general terms.
Software
Which software runs a DIY camera dartboard?
You need software that calibrates each camera, spots new darts and turns them into scores. Before you build, check how many cameras it supports, where the pictures are processed and what it costs to run.
- How many cameras?Make sure it takes as many as you plan to mount, and that one camera can drop out without stopping the game.
- Where do the pictures go?Processing on your own computer keeps the pictures of your room at home.
- What does it cost?Free, a one-off price or a subscription. Ask whether an account is required.
- Does it run offline?Scoring at home shouldn’t depend on someone else’s server.
Sridu is one option. It is a browser app, free for private use, that works with one to four webcams. The detection runs in the browser on your own computer, best in Chrome or Edge, with no account, and it works offline once installed.
Setup and calibration are in the camera setup guide, fine-tuning in better detection. You can also start the online darts scorer and tap your darts until the cameras are up.
FAQ
Questions about building a camera dartboard
How much does it cost to build your own auto scoring dartboard?
Roughly 100 to 250 euros for three webcams, an LED ring light, mounts and cables, if you already have the board and a laptop. With better webcams and metal mounts it comes to about 250 to 450 euros.
Can I use cheap webcams?
Yes. 720p is enough to measure a dart. More important than the price is a picture that stays the same, so look for fixed focus or focus and exposure you can lock in the browser.
Do I need a 3D printer?
No. An LED ring with camera holders, wooden arms on a plywood board or simple metal brackets work just as well. A printer only makes it easier to shape holders to your camera.
Why three cameras and not two?
Two cameras can measure a tip, but a dart in a tight group often hides another from one of them. With three, the other two still see it, so you correct far fewer darts.
Do I need an LED ring light?
Not strictly, but it is the easiest way to get even light. Any light from the front without hard shadows works. A single lamp from the side or a lamp behind the oche causes most missed darts.
Will the cameras get hit by darts?
Now and then a stray dart can reach one. Mount them outside the surround and away from the board edge, and they are rarely in the way.
Can a Raspberry Pi run the software?
Sridu runs in the browser of the computer the cameras are plugged into. Its requirements were measured on laptops, not on single-board computers, which are usually much slower per core. Open the demo on it: if it plays smoothly, it is fast enough.
Guides
Related guides
Test your build with Sridu
Open Sridu in Chrome or Edge, plug in your webcams and press Auto setup. No cameras yet? Start the demo and watch the detection on three simulated cameras.